Capstone FEA
Why that thickness and width of arms and links? – FEA
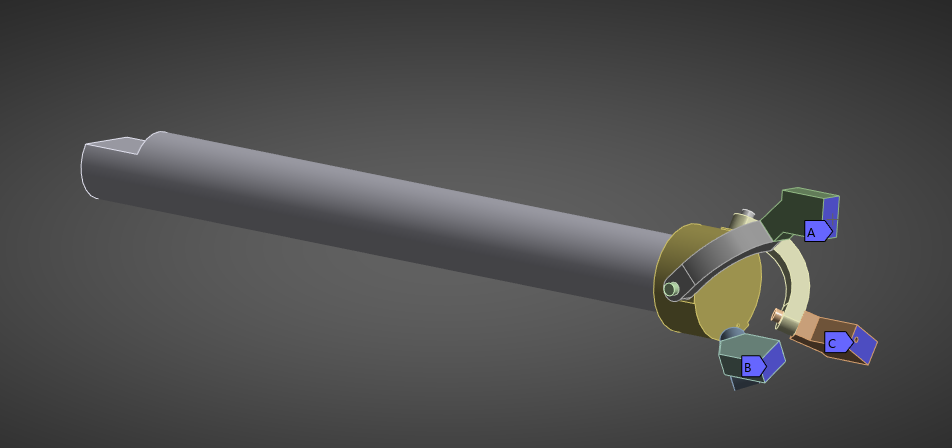
Step 1: Simplify the geometry

Step 2: Added the appropriate contacts/connections.
Arm cylinder to end-effector = bonded. Pure Penalty Formulation is used because the end effector has other bonded contacts at the threaded holes. If MPC was used here an over constrained condition occurs.
A more in depth explanation to why this a happens with MPC
Link to End-Effector x3
1. Bolt to hole = bonded (pure penalty and small sliding = on). Small sliding is turned on because you are telling the solver this should never slide, and makes it much more cheaper to solve. Small sliding locks the pairing locally.
2. Bolt head to Link = Frictional. This enforces the link to be secured underneath the bolt head. Small Sliding = off because this is a revolute joint which is intended to slide with some small friction.
Stiffness Factor = 2 (manual). Update each iteration.
Pinball radius = 3mm.
Interface Treatment = Add offset, Ramped Effects. This is the clean way to exclude initial penetration and also swallow any tiny gaps from meshing/chamfers under the head.
3. Link hole to Bolt Shank = Frictionless (Augmented Lagrange, Small Sliding = on, Stiffness factor = 2, Adjust to Touch). This contact enforces no penetration, and allows for rotation with no friction.
Why Augmented Lagrange?
AL is basically pure penalty penalty + an iterative correction to the contact pressure (a “multiplier update”). You get tiny penetration like LM, with conditioning close to penalty. That’s why it’s the Mechanical default for most standard normal-contact problems—frictionless or frictional.
Why Small Sliding = on?
Small sliding assumes the contact patch stays near the initial projection. It’s faster and more stable because the code doesn’t have to constantly re-search the opposite surface.
Why Adjust to Touch?
I have a clearance fit plus large-deflection motion. If you start with an open gap, the solver has to “find” contact as the shank drifts over—often many small substeps and occasional contact chattering.
By closing the small gap up front (~0.25 mm), you removed that early hunt/chatter phase. That’s why my second load step marched forward cleanly without contact-finding headaches.
The link has a clearance hole for this simplified geometry. This gap causes things to fail during the simulation. In reality, the real system uses bearing that sit on the bolt shank.
This contact carries compressive reaction forces on the surfaces and produces local contact pressure which is important for stress analyzation. A pure revolute joint would pass load through a constraint at the center and you’d see almost no hole edge stress.
4. Revolute Joint between bolt shank and link hole
OMITTED – With a revolute joint, the joint steals load from the contact area because the joint enforces zero relative translation between the two points. That kinematic constraint resists the transverse offset that would otherwise push the shank into the hole wall—so the solver can satisfy equilibrium through the joint reactions before the surface contact ever has to engage meaningfully.
“Two Remote points were created on the bolt shank and link hole from a specified coordinate system. This joint creates clean, numerically stable kinematics. It prevents rigid-body motion, gives you the correct single rotational DOF, and aligns the hinge axis. Without it (especially with real clearance) the assembly can start the solve unconstrained”
I fixed the issue of the simulation by having step 1 have no loading so the contact can set with adjust to touch.
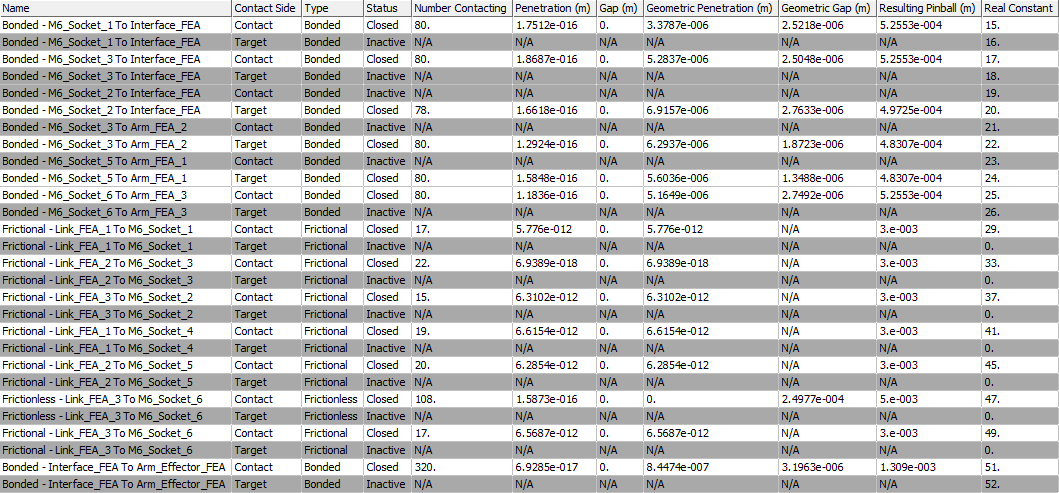
Initial Contact Information – Analysis

All active initial contacts are closed which is desired.
Penetration / Gap ≈ 0 with Geometric Penetration/Gap = small, non-zero.
Resulting Pinball values make sense:
Frictionless shank↔hole pairs show 5.0e-03 m → that’s my 5 mm pinball
Frictional and bonded pairs are ~4.8–5.3e-04 m (≈0.5 mm), which is the program-controlled pinball based on local mesh size
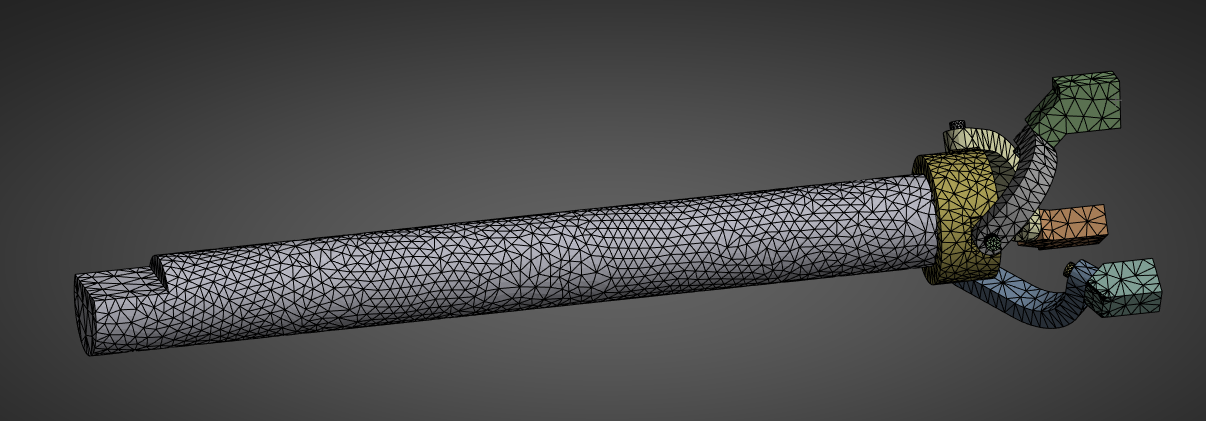
Step 3: Create the mesh
Using 7.5mm global and 2.5mm for bolt bodies and faces
Step 4: Analysis Settings
Number of steps = 3.
Step 1: No Load Step to set the contacts before load is applied and adjust to touch takes effect without breaking the system.
Initial 10, Min 1, Max 50. – My standard for non intensive steps.
Step 2: Load step 1 introduces a ramping of gravity and the external load at the end of the arm acting as the weight.
Initial 100, Min 1, Max 1000. When solving it was found that this step caused issues with converging. Too few of substeps was a factor because each substep had an increase in force that was large, affecting the solvers ability to gradually converge.
Step 3: Needed a third step to ramp the load in step 2. An ansys bug. Problem is already solved at this step because no additional loads introduced. 5,1,10 just reduces solve time.
Direct Solver – Ansys recommended I use it. It is the recommended type for frictional contact, bolt pretension, large deflection, and lots of contact pairs.
Large Deflection = On. The large load ramping it is expected to cause large deflection.
Step 5: Materials
Bolts: 316 Stainless Steel
Everything Else: 6061 Aluminum with properties from the CNC manufacturer.
Note: the arm is a solid body of aluminum with mass 4.5Kg, which is a bit more heavy than actual arm. But I want it to be solid with no bending, only want to analyze the links. It is sufficient for this analysis.
Step 6: Add the loads and fixed supports
Acceleration: A way of adding gravity that can be ramped from step 2 onward.
Load: Newton Force at end of the arm to represent the payload the arm is picking up. It is ramped from 0 to 50N in step 2 and 50 to 200N in step 3 to determine yielding point of static load.


Step 7: Results
Equivalent Von Misses Stress
Note: 6061 AL has yield strength of 240 MPA (2.4e8). Want to analyze any part which surpasses 80 – 120 MPA (safety factor 2 to 3).
Note: 316 Stainless Steel bolt has yield strength of 450 MPA. Want to analyze if any bolts surpass 225 MPA (safety factor of 2)
Note: Remember each motor can theoretically only output ~ 30 Nm of torque, which translates to ~ 10Kg of payload capacity. If only one motor is being actuated in the movement, a single motor should be able to rotate to pick up the mass (as a safe conservation). Therefore the max load the arm should see is ~100N.

I need to do further investigation where the stress above 80 MPA is occuring
Von Misses – Isolating for Links

We can see that the maximum stress in any of the links is 75 MPA, which confirms that each link has a safety factor of 3. This is what we want and designed for in the initial FEA of a single link.
Von Misses – Isolating for Arms

We can see that the maximum stress in any of the arms is 48 MPA, which confirms that each link has a safety factor of 5. This is well above our minimum factor of safety of 2.
Von Misses – Isolating for End-Effector

We can see that the maximum stress in the end-effector is 65 MPA, which confirms that each link has a safety factor of 3.7. This is above our minimum factor of safety of 2.
Von Misses – Isolating for Bolts

We can see that the maximum stress a bolt is 230 MPA, which confirms that each bolt has a safety factor of 1.95. This is our minimum factor of safety of 2.
Note: Increasing the bolt size to a larger diameter is possible, but will either:
- Critically reduce the material at the end of the links for the holes. (a bearing isn’t simulated here so the link actually has less material at the ends than simulated).
- Drastically reduce the range of motion of the joint because a bigger link head equals less rotation until collision of links.