Design for Manufacturing

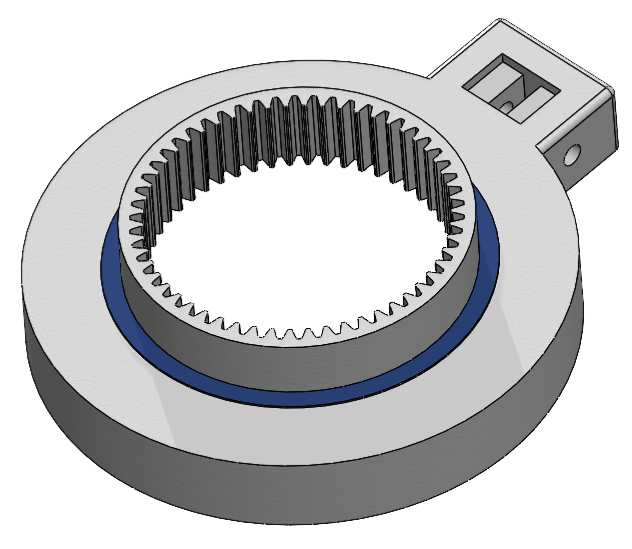
Purpose: To design parts, assemblies so they’re easy, cost-effective, and reliable to manufacture.
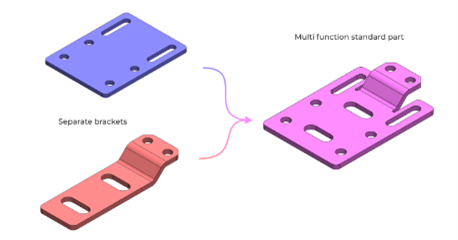
Minimize Part Count

  • Tooling Setups , Fasteners,  Assembly Time, Lower Inventory

Standardize Materials and Manufacturing Process

  • Off the shelf materials  + Select on: How strong? Thermal properties, how heat resistant? What colour? Insulator or Conductor?
  • Standardized Manufacturing process for your part volume
  • Low Volume: 3D printing, CNC Machining, Machine Shop
  • High Volume: Injection, Die Casting, CNC, Sheet Metal, Extrusion, Stamping, Forging, Casting

Tolerance Parts Appropriately 

  • Only specify tight tolerances when required, depends on application (0.01mm)
  • High Tolerance: CNC spindle shaft application: Rotates cutting tool, critical surface where shaft slides on roller bearings.
            • Weak tolerances = runout = vibration.
            • High RPM with small radial runout = high force on bearings 
            • Part being machined is inaccurate. Radial runout = wobble of turn,  Axial runout = up and down motion 
  • Low Tolerance: Sheet Metal bracket to fasten a control panel.
            • Holes and bend angle can have low tolerances because hole misalignment will not cause issues with clearance holes

Why Does Tolerancing Affect Cost?

  • Requires more expensive equipment 
  • Slower spindle speeds to avoid deflection and vibration = more time
  • Custom fixtures required, off the shelf vices won’t do the job
  • Post processing inspection = increased time
  • Reject rate increases = wasted time and material
  • Requires specialized machinists 

Self-Locating Features

  • Such as bosses, tabs and chamfers that guide assembly and fixturing

Design for Process Selected

  • Align holes, reuse fixturing points, and use symmetrical features

Capstone

Base Plate: Standard steel material 201 annealed steel

  • Available for easy purchasing
  • Great machinability due to its reduced hardness (cleaner holes, less chatter marks or burns)
  • Cheapest option

Pinion and Gears

  • No available gears to purchase – CNC or 3D print 
  • 3D printing option was selected due to budget limitations
  • Selected carbon fiber nylon for its strength to weight ratio, and it is the strongest material available at the print shop
  • Our module of 1.5mm was large enough for good 3D printing quality after printing small prototypes 

Arm and Links

  • Used off the shelf available material 6061 aluminum and made the design as simple as possible

End-Effector 

  • Made one solid part to reduce the quantity of parts and eliminated any additional fasteners
  • Designed for CNC machine as internal holes were lined up with the external holes to make them accessible

MRI Bed

  • Designed all parts to be manufactured in house via bandsaws, 3 axis CNC machine, Drill press, and hand tools
  • 3D printed parts designed, or spliced for build volume restrictions

UW Robot

  • Chassis and parts are 3D printed
    • Designed parts in accordance with manufacturer’s guidelines -> Build Size (780x780x530), Wall thickness (0.8mm), Embossed and Engraved details, and Tolerances 0.3mm

Design for Assembly

Purpose: To design parts, assemblies so they’re easy and time-efficient to manufacture.

Minimize Part Count

  • Aim to use multi-functional components
  • For each component, ask yourself “is this part necessary at all?
  • Can a part’s primary function be performed by another part already in the assembly

Reduce Fastener Types & Counts

  • Favor snap fits over screws. If screws are appropriate, limit sizes used. 

Self‑Locating & Self‑Fastening Features

  • Incorporate chamfers and lead‑ins so parts naturally align and latch without external fixtures.

Design for Handling

  • Ensure parts are big enough and shaped for easy pick up by hand or robot gripper; avoid tiny, delicate pieces that require tweezers.

Minimize Assembly Operations

  • Strive to eliminate non value added steps: no reorientation, no secondary tooling changes, no adhesives or curing steps unless essential
  • Top-Down Assembly, use gravity

Symmetry & Orientation Control

  • Wherever possible, use symmetrical parts or keyed features so components can’t be installed backwards.

Capstone Project:

  • Easy Stackable Design. Uses an orientation with gravity to easily assemble.
  • Standardized the same M6 screws for all arms and links.
  • Hole to identify location of long link, as it is a fraction of a millimeter different.
  • No adhesive curing steps
  • PVC tube arm screws accessible after installation.

MRI BED:

  • Designed for assembly and disassembly (installation) to the scanner.
  • All fasteners outside the scanner, designed as an attached one unit piece, so easy slide out.

Filter Prototype:

  • Minimized all fasteners.
  • Modular, and Stackable design, easy assembly.
  • All filters have symmetry so there is no incorrect orientation available for stackable design.